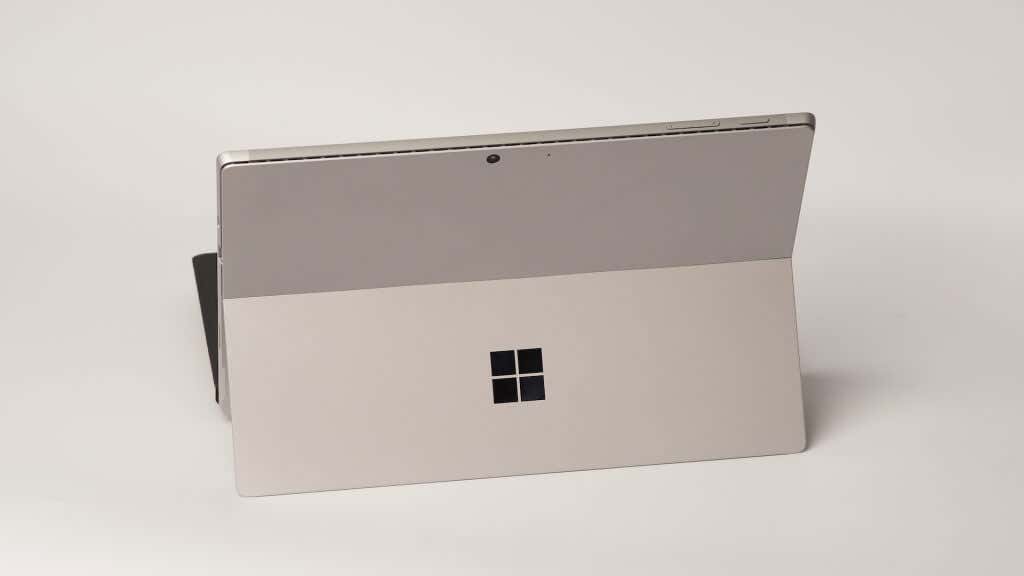
Before you proceed, check that nothing is covering your Surface’s camera. If your Surface has two cameras or uses an external webcam, verify that you selected the correct camera in your application.
1. Re-Enable or Restart Your Camera
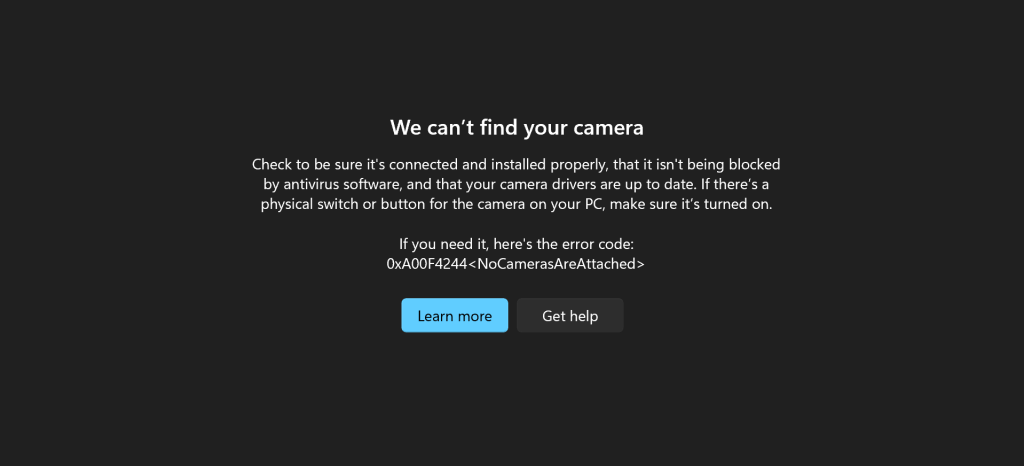
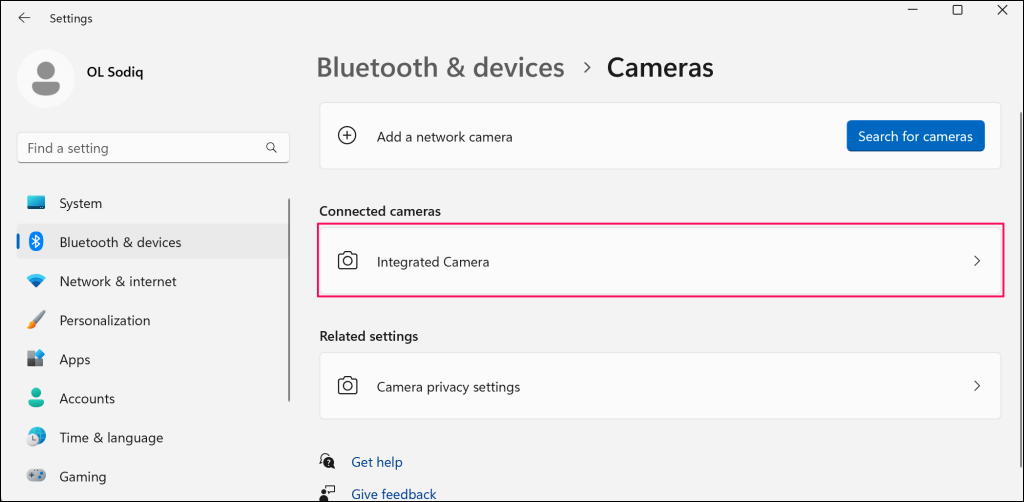
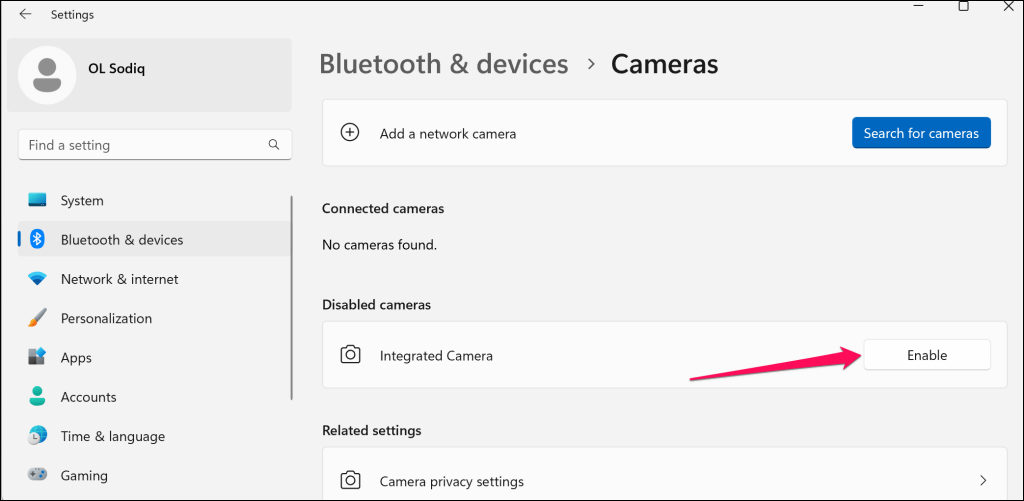
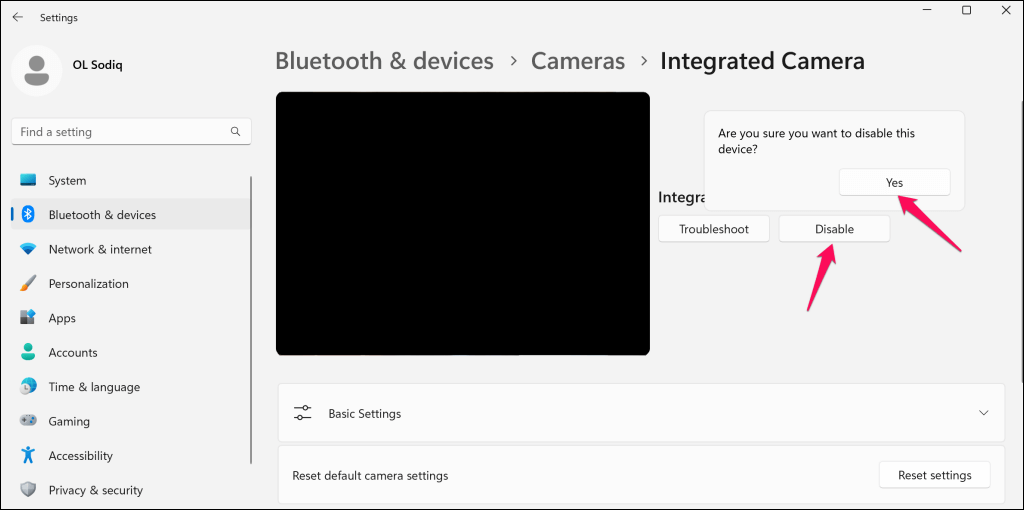
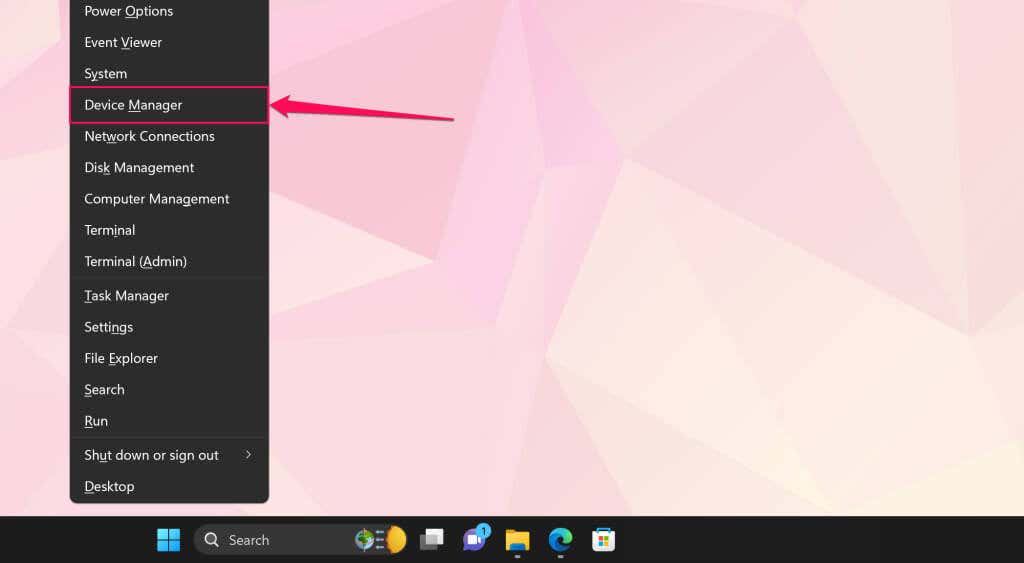
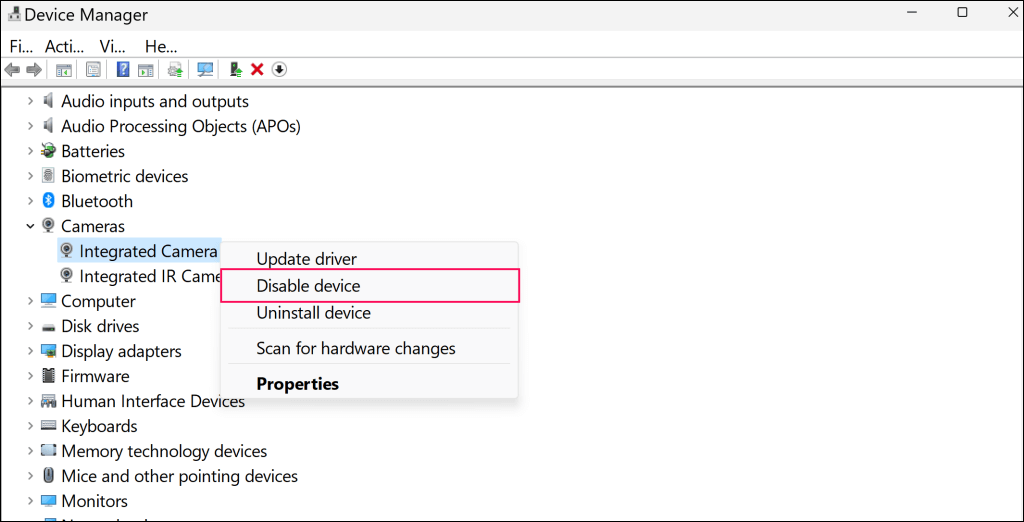
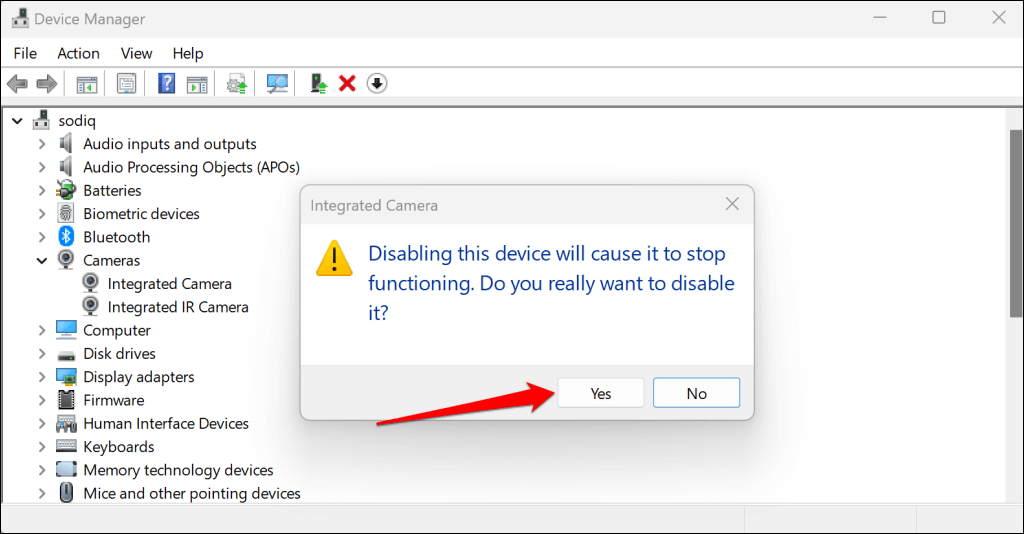
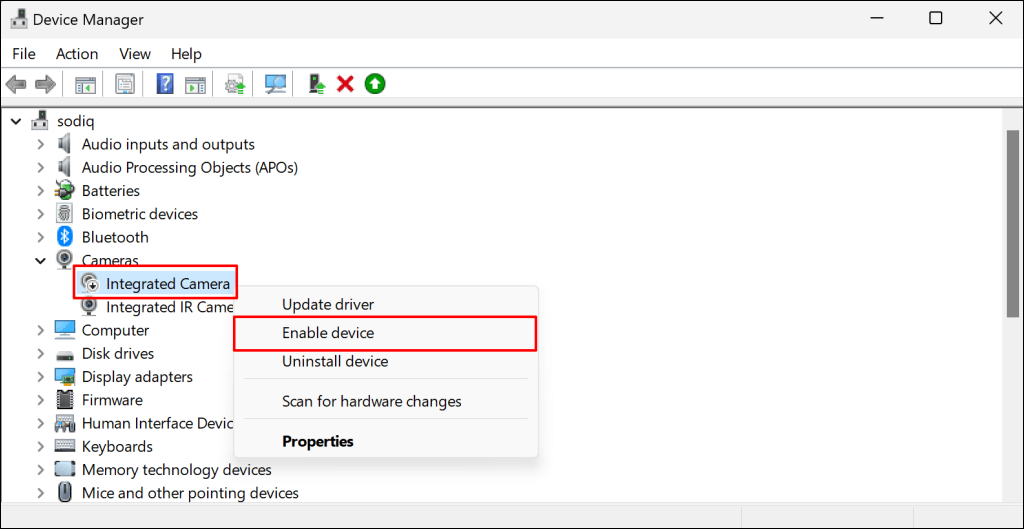
The Camera app and some video conferencing apps display a “We can’t find your camera” or “No camera found” error when they can’t detect your camera. This typically happens when the built-in camera is disabled, faulty, or non-functional. Check your Surface’s camera status in the Windows Settings menu or Device Manager and turn it on if disabled. Disable and re-enable the camera if it’s enabled but not working. Close the affected applications and follow the steps below.
Re-Enable Surface Camera in Windows Settings
If the camera is disabled, tap the Enable button to turn it back on. In Windows 10, go to Settings > Devices > Cameras to access your Surface’s camera settings. Re-enable the camera (see step #1), open the affected app(s), and check if the camera now works.
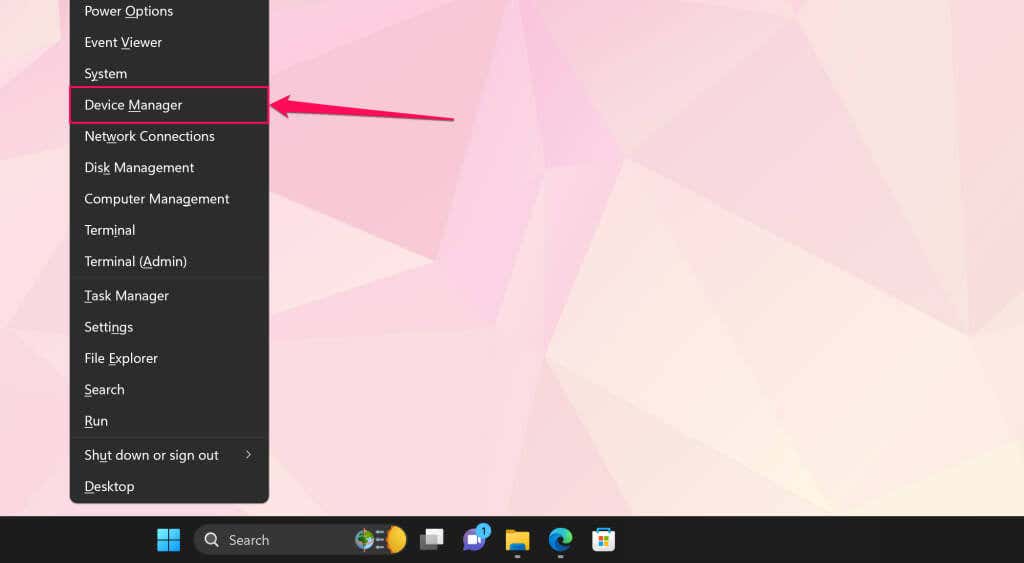
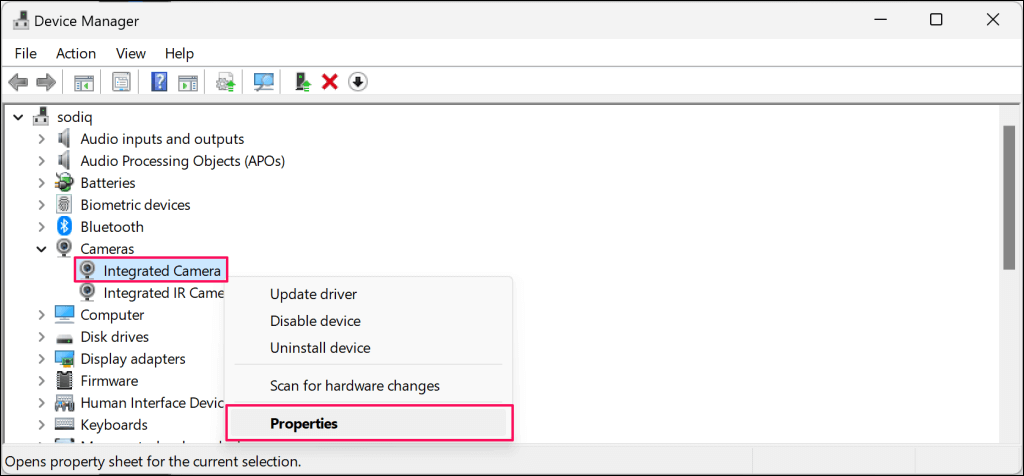
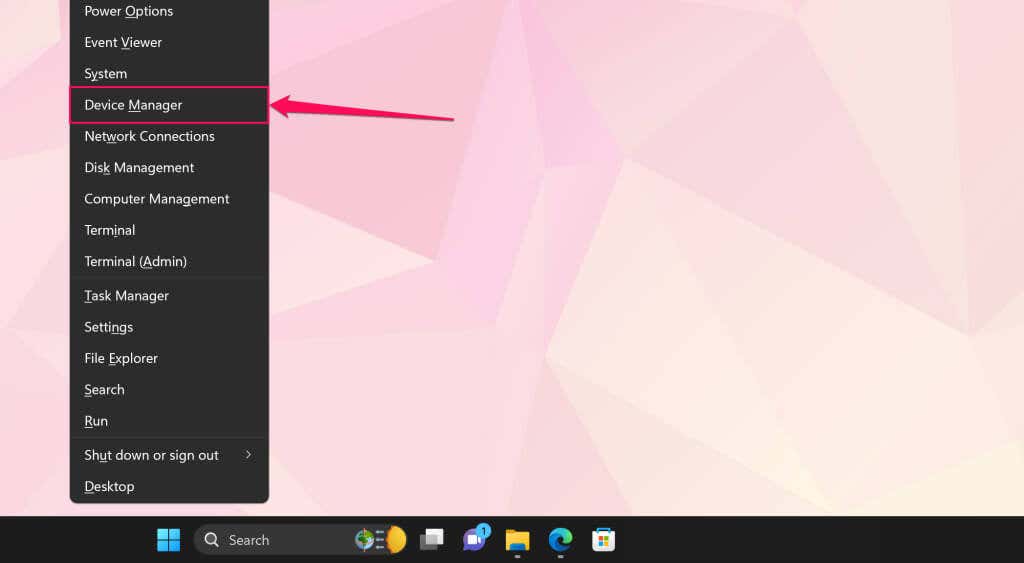
Re-Enable Surface Camera in Device Manager
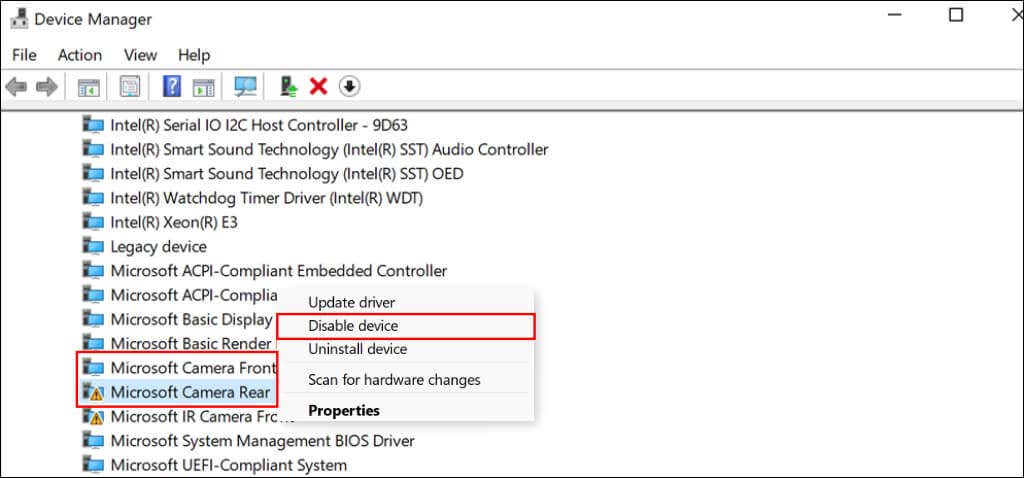
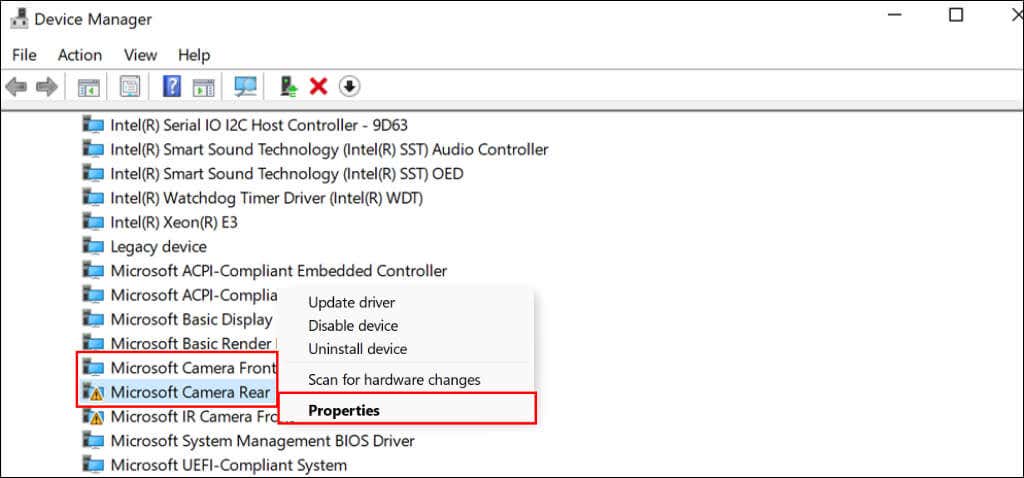
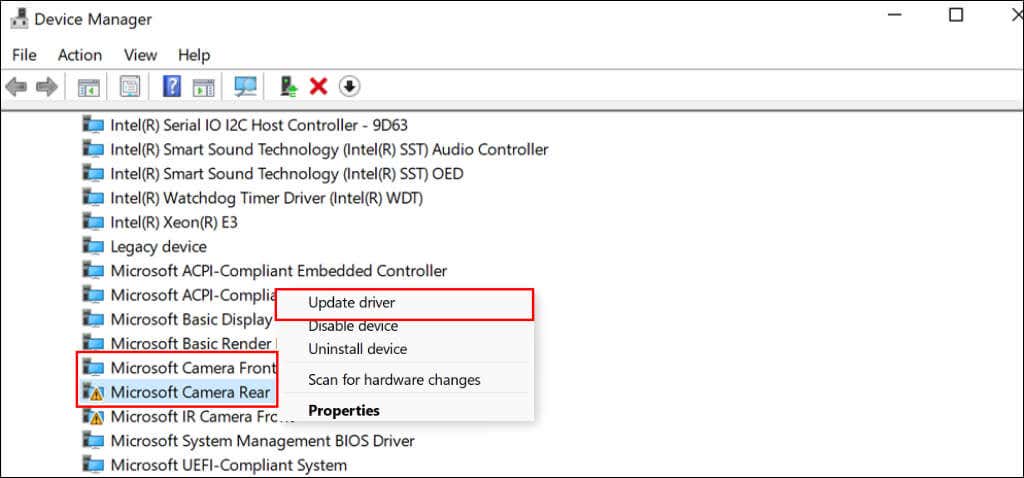
Your camera driver and its placement in the Device Manager may vary depending on your Surface model, camera configuration, or operating system. You’ll find the camera drivers in the System Devices category on some Surface models with dual cameras. Right-click Microsoft Camera Rear and select Disable device to disable the rear camera. Otherwise, right-click Microsoft Camera Front and select Disable device to disable the front-facing camera. Afterward, open the affected apps and check if your Surface camera works.
2. Turn On Camera Access in Windows Settings
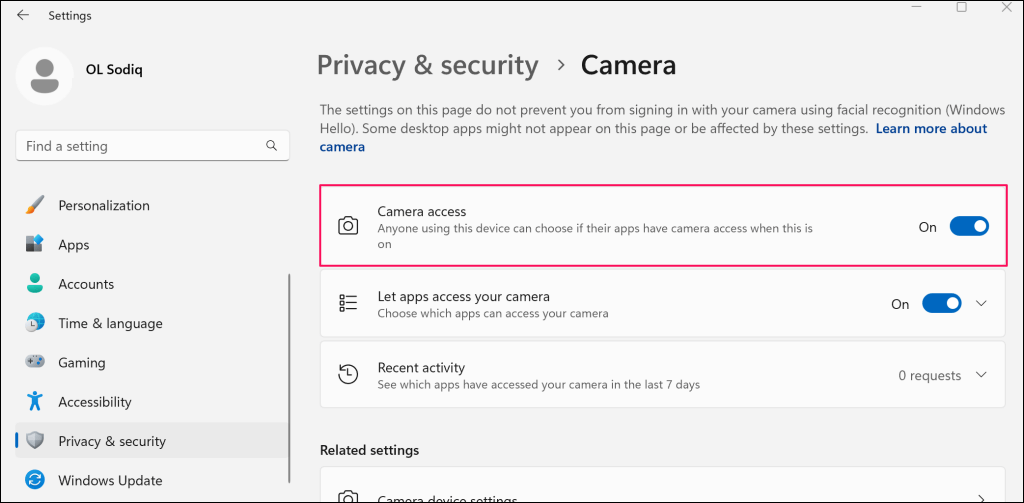
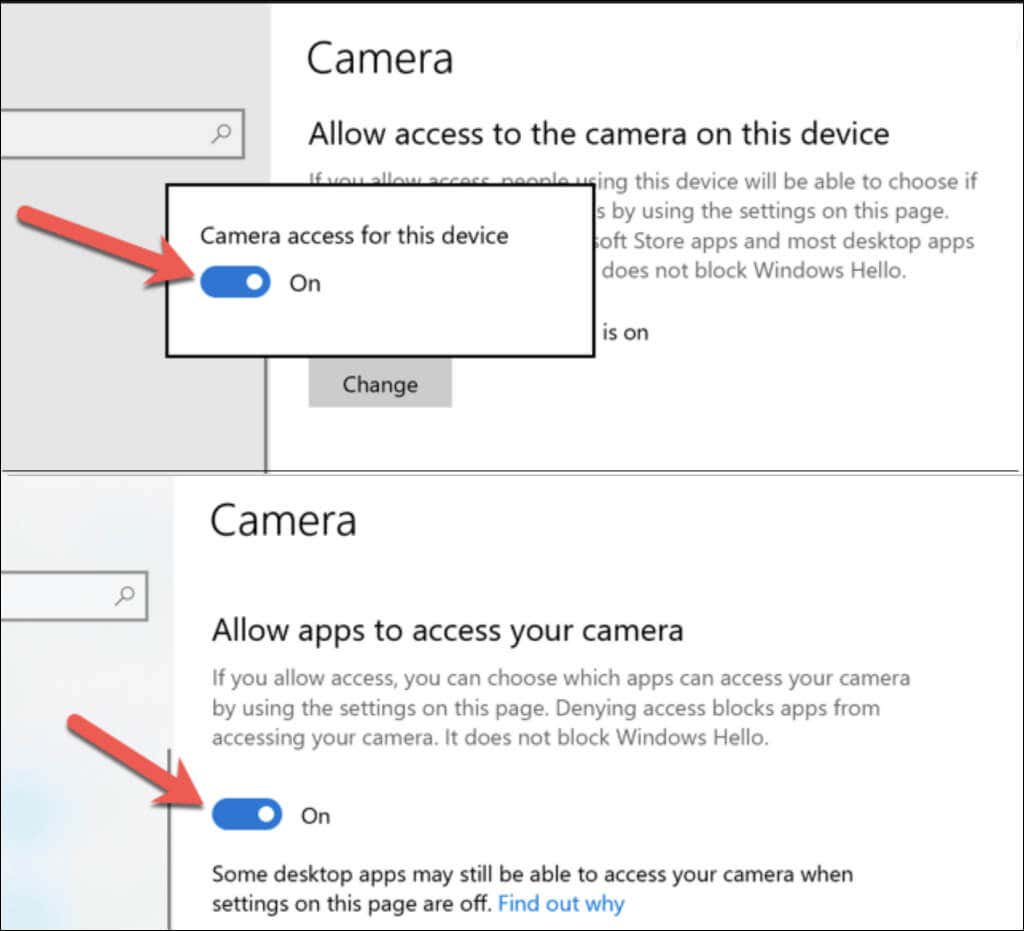
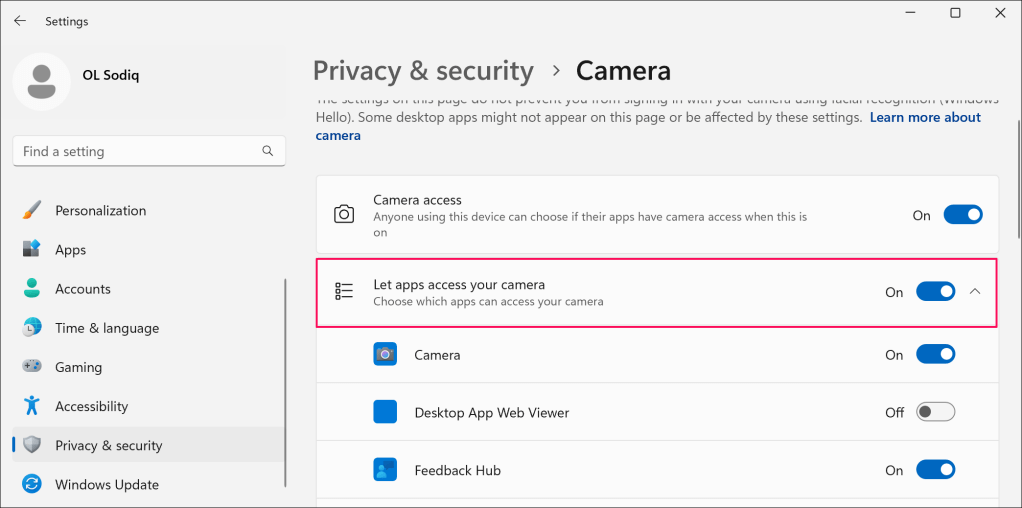
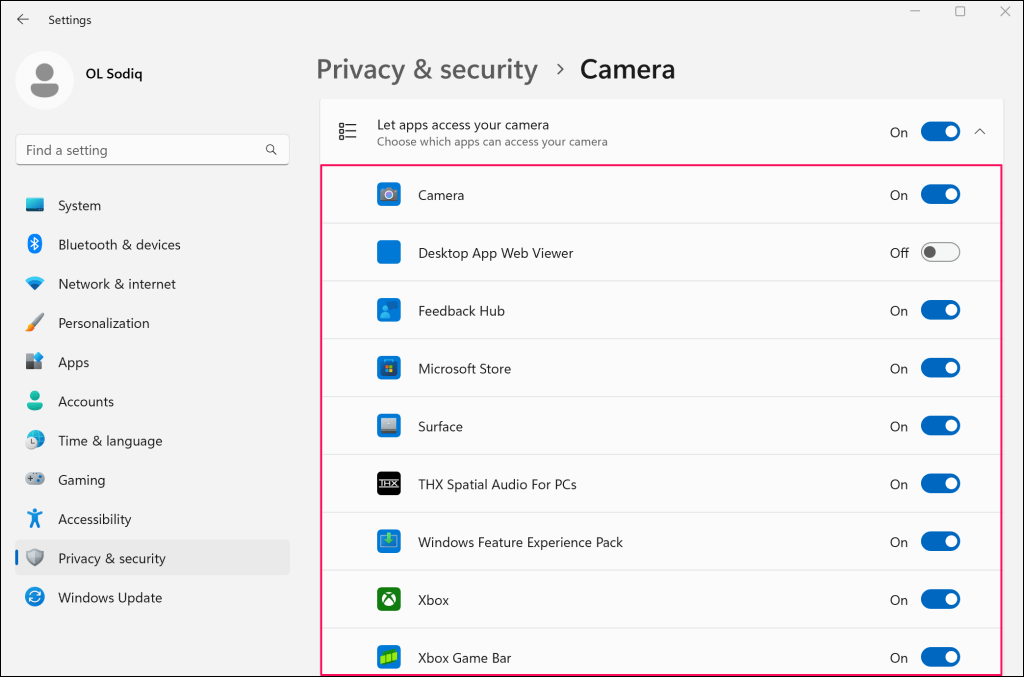
If you’re using a Surface device with a standard or guest account and the camera doesn’t work, that’s likely because the administrator disabled camera access for non-administrative users. Contact the device administrator, sign in to an admin account, and change the camera access settings. In Windows 11, head to Settings > Privacy & Security > Camera and toggle on Camera access. If your Surface runs Windows 10, go to Settings > Privacy and select Camera. Select the Change button and turn on Camera access for this device. Afterward, scroll down the page and toggle on Allow apps to access your camera. Your Surface camera should now work when using a guest or standard account.
3. Check App Permission Settings
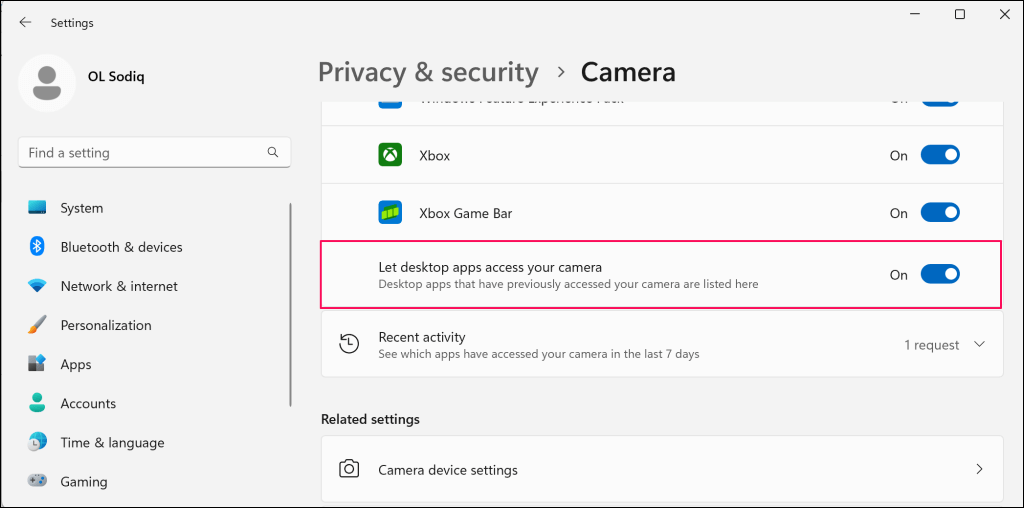
If your camera doesn’t work in a specific app, ensure the app has camera access in Windows privacy settings. Enabling this option grants camera access to applications installed outside the Microsoft Store.
4. Check Your Antivirus Software Settings
Some third-party antivirus or malware protection software have settings that can block an app’s webcam access. If you use an antivirus, review its settings, and ensure it isn’t stopping apps from accessing your Surface’s camera. You can temporarily disable the antivirus, just to be sure.
5. Force Shutdown and Reboot Your Surface
Forcefully shutting down your Surface can resolve issues with malfunctioning hardware components—camera, microphone, USB ports, etc. Close all open applications, so you don’t lose unsaved data. The steps to force a shutdown vary depending on your Surface model.
Force Shutdown Newer Surface Models
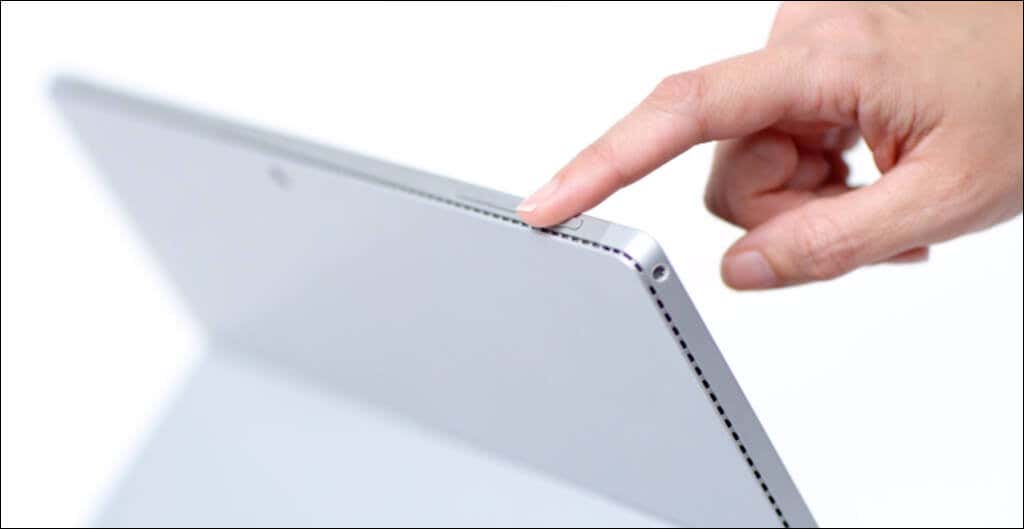
This method applies to the Surface Pro 5 (or newer), Surface Book 2 (or newer), and any Surface Laptop, Surface Go, or Surface Studio model. Press and hold your Surface’s power button for about 20 seconds. Release the power button when the Microsoft logo screen appears.
Force Shutdown Earlier Surface Models
This method applies to the Surface Pro 4 (or earlier), Surface Book, Surface 2, Surface 3, and Surface RT.
6. Roll Back Your Surface’s Camera Driver
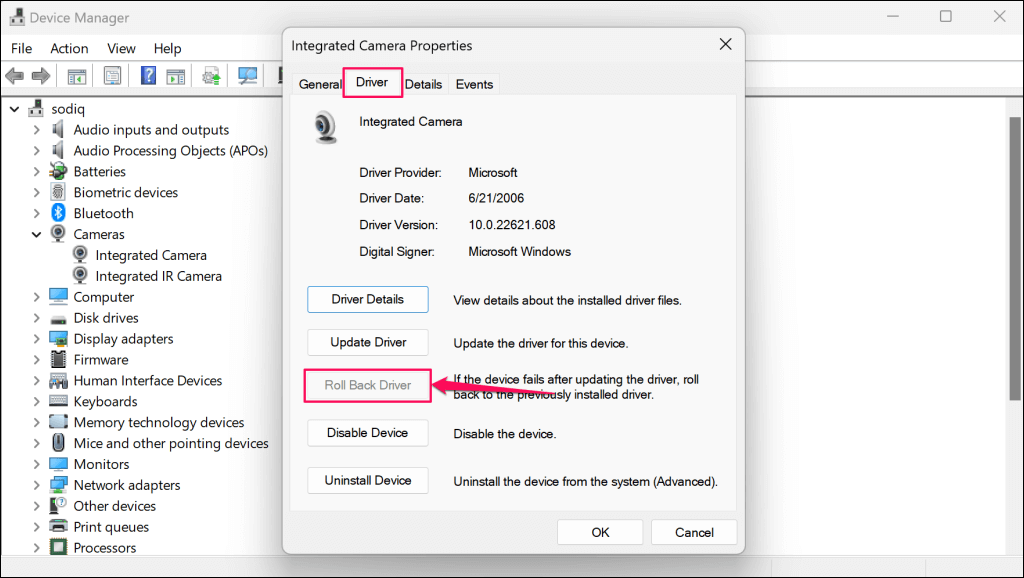
Did your camera stop working after updating your Surface drivers—or the camera driver specifically? If yes, the newly-installed camera driver is likely buggy, unstable, or incompatible with your Surface. Roll back the camera driver to its previous version and check if that resolves the issue. If your Surface has two cameras, expand the System Devices category, right-click Microsoft Camera Front or Microsoft Camera Rear, and select Properties. If the “Roll Back Driver” option is grayed out, your Surface doesn’t have an older camera driver version. Update the driver if you can’t restore its previous version or if the issue persists after the rollback operation.
7. Update Your Surface and Surface Drivers
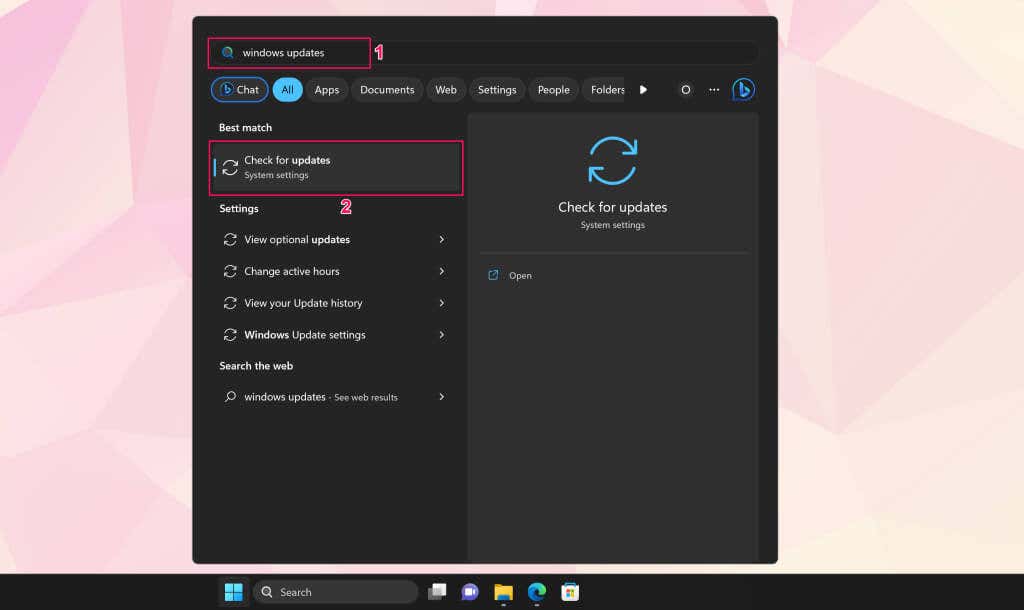
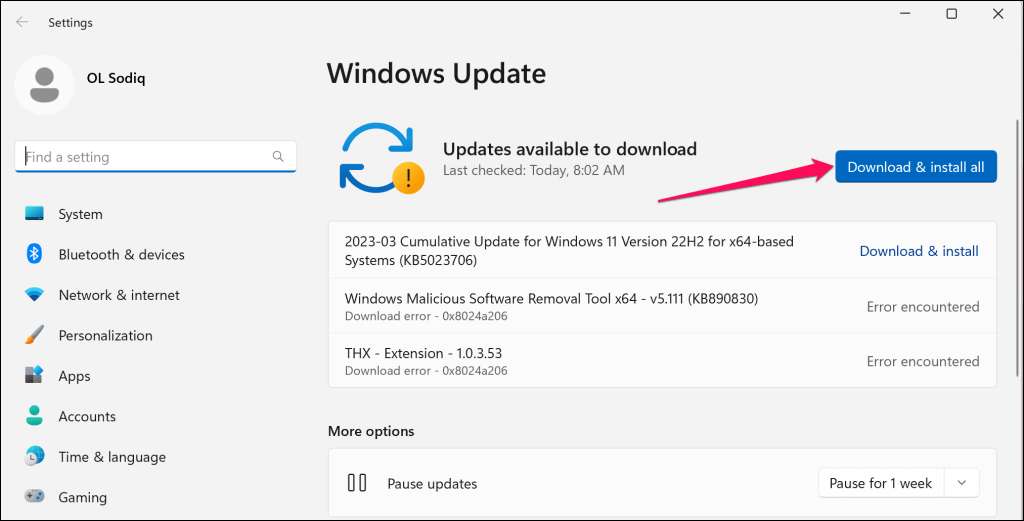
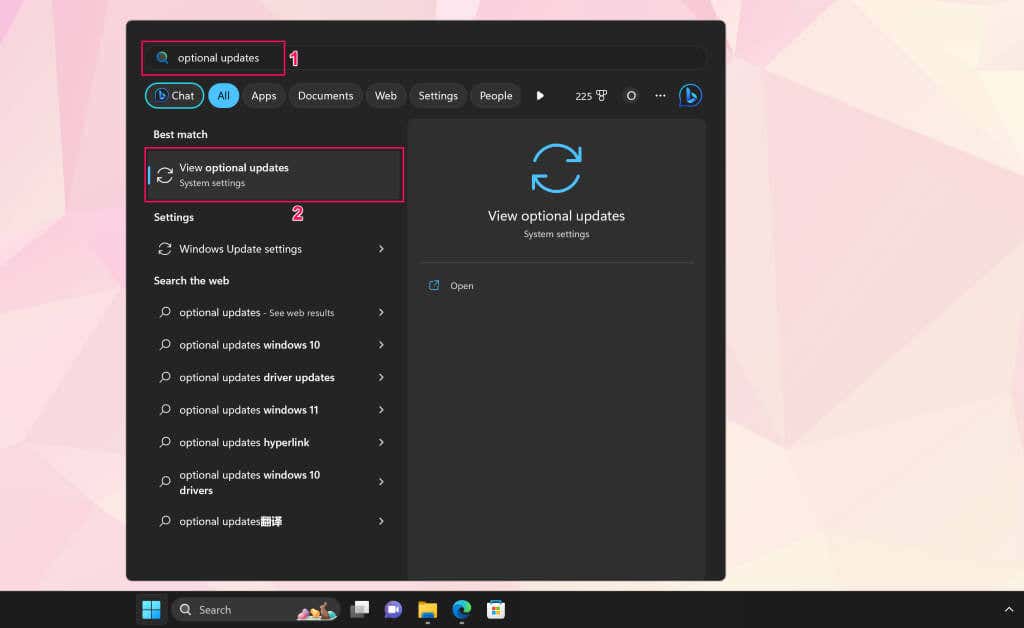
Updating your Surface’s operating system and installing optional updates can resolve camera issues.
Update Surface via Windows Settings
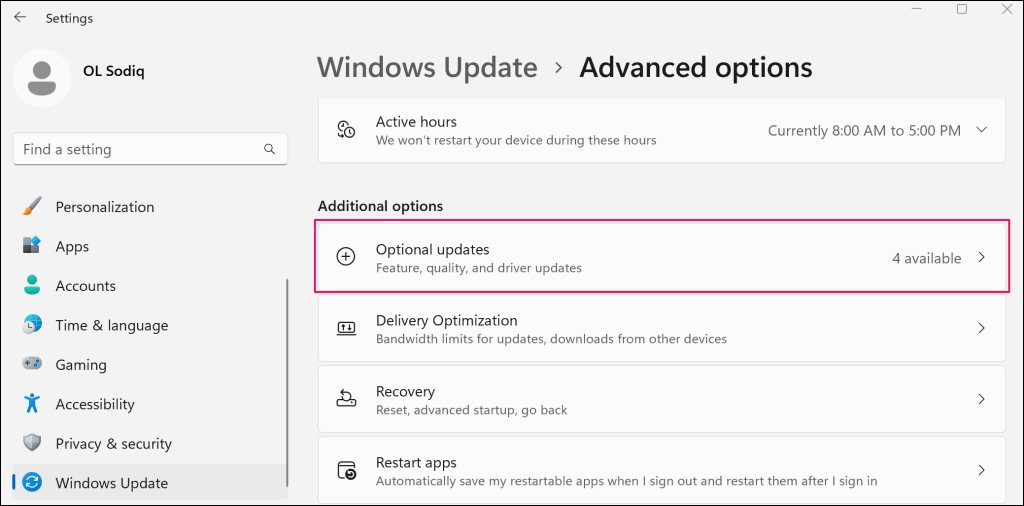
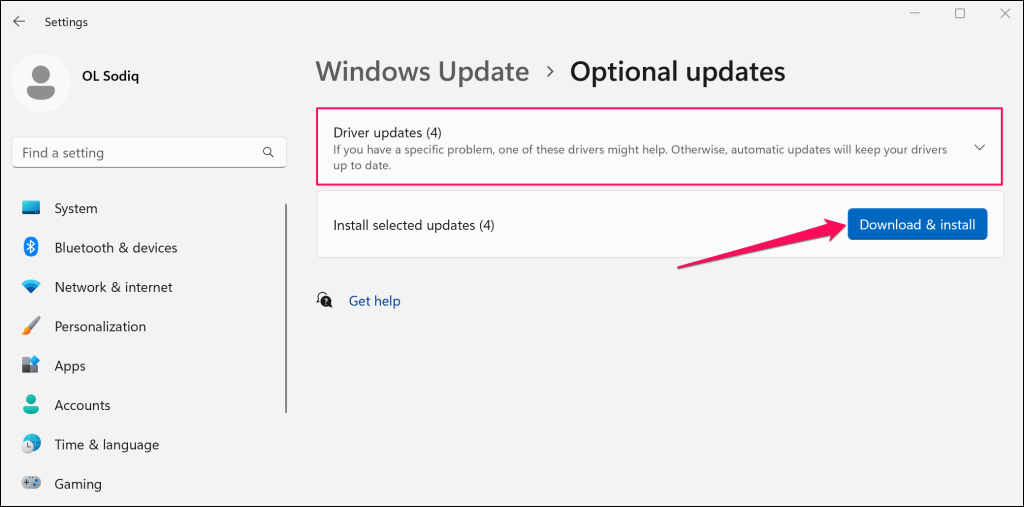
Check for optional driver updates while the software updates download and install. Alternatively, go to Settings > Windows Update > Advanced options and select Optional updates. Reboot your Surface when the software and driver installations are complete.
Updates Camera Driver via Device Manager
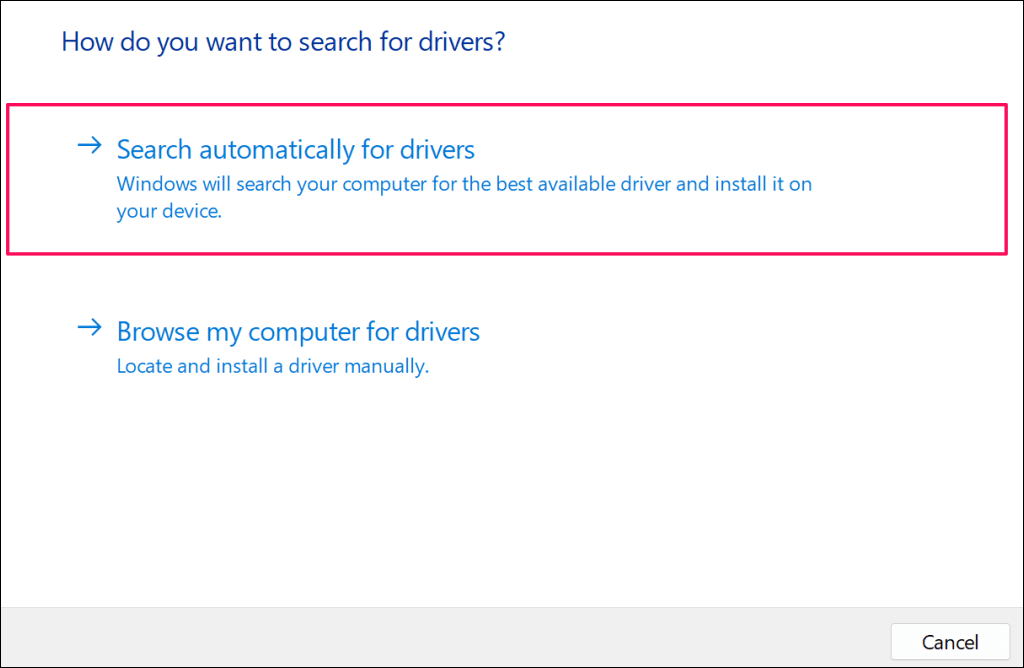
Connect your Surface to a Wi-Fi network and manually update your camera driver to the latest version. Windows will download and install any available update for your Surface’s camera driver.
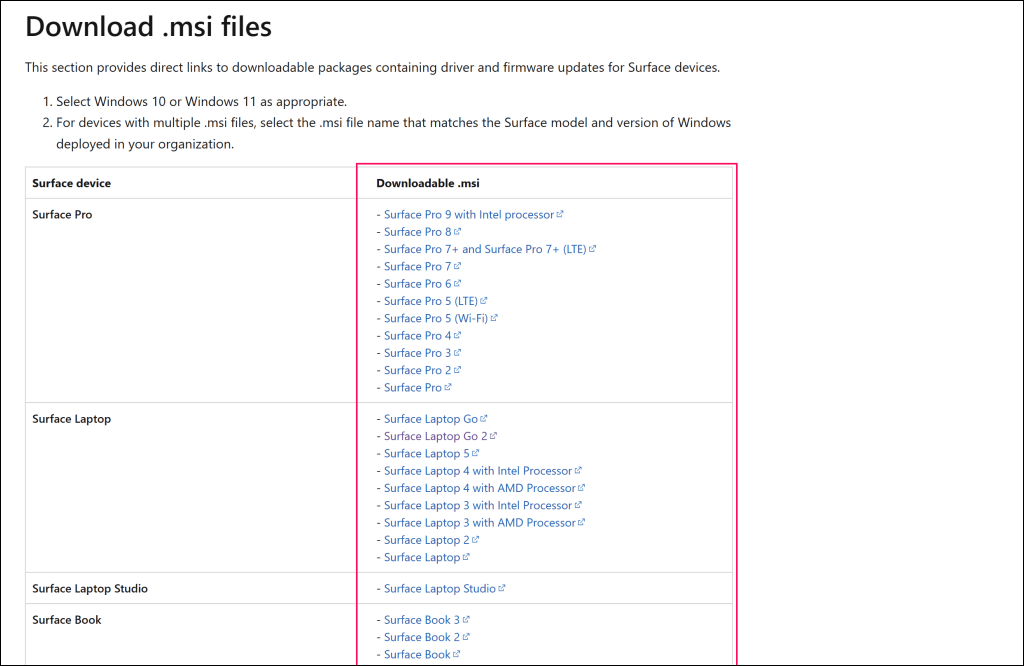
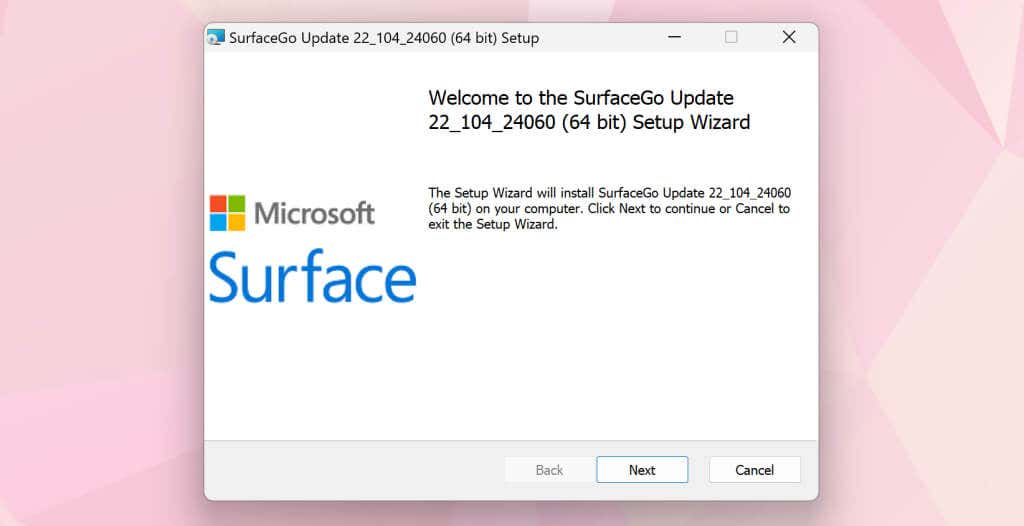
Update Surface via Microsoft Website
Get Your Surface Serviced
We’re confident that at least one of the recommendations should get your Surface camera working again. You may need to reset your Surface to factory settings if the problem persists. Before resetting your device, try contacting Microsoft Surface Support to have your Surface diagnosed or serviced.
